Safe Tanning Tips for Sensitive, Sunburn-Prone Skin

Getting a golden glow when your skin burns at the first sign of sun sounds like a losing battle—but it doesn’t have to be. Sensitive skin requires a more thoughtful approach to tanning, one that prioritizes protection without sacrificing results.

The good news? With the right preparation, gentle techniques, and proper aftercare, even the most sun-reactive skin can achieve a beautiful, healthy-looking tan. This guide covers everything you need to know, from choosing the right SPF to exploring self-tanners that deliver a natural finish—no UV damage required.

Tanning with Sensitive Skin

Protecting Your Sensitive Skin from Sunburn

Before you even think about tanning, protection has to come first. Sunburn isn’t just uncomfortable—it’s a sign of DNA-level skin damage that, over time, increases the risk of premature aging and skin cancer.

The Importance of Sunscreen for Sensitive Skin

Sunscreen is non-negotiable for sensitive skin types. Unprotected UV exposure triggers inflammation and burns far more quickly in reactive skin, often before any tan has the chance to develop. A good sunscreen creates a protective barrier that allows you to spend time outdoors without paying for it later.

For those with sensitive skin specifically, look for mineral sunscreens containing zinc oxide or titanium dioxide. These sit on top of the skin rather than absorbing into it, making them far less likely to cause irritation or allergic reactions compared to chemical alternatives.

Choosing the Right SPF and Broad-Spectrum Protection

SPF 30 blocks around 97% of UVB rays, while SPF 50 blocks approximately 98%. For sensitive skin, SPF 30–50 is the sweet spot—high enough for meaningful protection, without the thicker formulas that higher SPFs sometimes require. Always opt for broad-spectrum protection, which guards against both UVA rays (which cause aging and long-term damage) and UVB rays (which cause burning).

Apply sunscreen 15–20 minutes before sun exposure and reapply every two hours—or immediately after swimming or sweating. Don’t forget easy-to-miss spots like the tops of your ears, the back of your neck, and your feet.

Gentle Tanning Methods for Sensitive Skin Types

Protection comes first, but tanning is still achievable. The key is going slow and exploring methods that work with your skin, not against it.

Gradual Sun Exposure for a Natural Glow

Short, controlled bursts of sun exposure are far better for sensitive skin than long, uninterrupted sessions. Start with 10–15 minutes of morning sun (before 10 a.m.), when UV index levels are at their lowest. Gradually add a few minutes over several days to allow your skin to adjust and melanin production to build up naturally.

Avoid peak sun hours between 10 a.m. and 4 p.m., when UV radiation is strongest. Wearing protective clothing like a wide-brimmed hat and UV-blocking sunglasses adds an extra layer of defense while you build your base.

Exploring Self-Tanners and Their Benefits

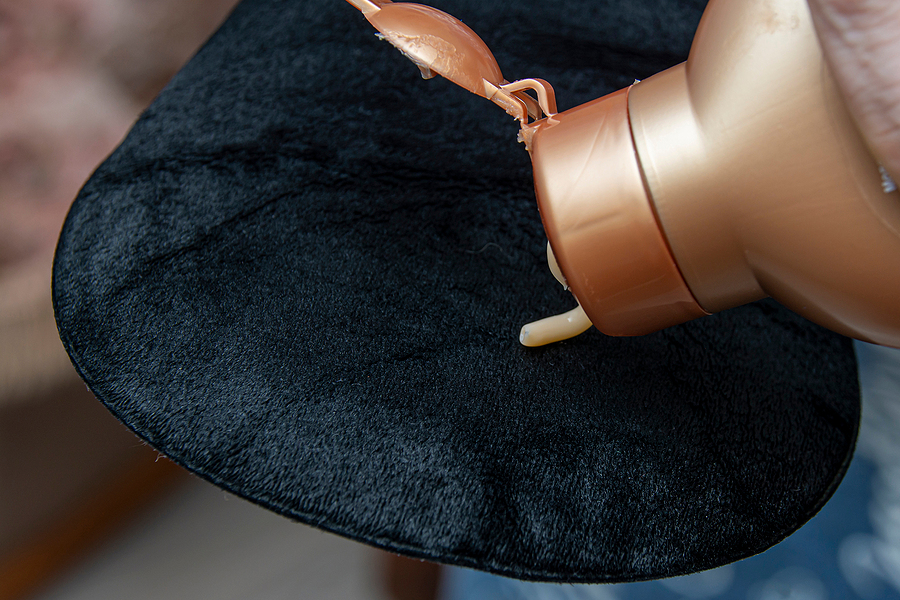
Self-tanners have come a long way. Modern formulas offer streak-free, natural-looking results without any UV exposure—making them an excellent option for sensitive skin. The active ingredient, dihydroxyacetone (DHA), reacts with the outermost layer of skin to temporarily darken its appearance. No sun required.

For sensitive skin, look for self-tanners that are fragrance-free, alcohol-free, and dermatologist-tested. Gradual tanning lotions are especially forgiving, allowing you to build color slowly and avoid any sudden, harsh color shifts. Always exfoliate gently before applying and moisturize dry areas like elbows and knees to prevent uneven absorption.

Post-Tan Care: Soothing and Hydrating Sensitive Skin

What you do after sun exposure matters just as much as what you do before. A solid post-tan routine keeps your skin calm, hydrated, and your glow lasting longer.

Moisturizing to Extend Your Tan and Prevent Peeling

Dry skin peels—and peeling takes your tan with it. Applying a rich, fragrance-free moisturizer daily locks in hydration and helps the skin’s outer layer stay intact longer. Look for ingredients like hyaluronic acid, glycerin, and ceramides, which replenish moisture without irritating sensitive skin.

Moisturize within a few minutes of stepping out of the shower, while your skin is still slightly damp, for maximum absorption. This one small habit can significantly extend the life of your tan.

Aloe Vera and After-Sun Lotions for Comfort

If your skin feels hot, tight, or slightly red after sun exposure, aloe vera gel is one of the most effective and gentle remedies available. Its anti-inflammatory properties cool the skin and reduce redness quickly. Store it in the fridge for an even more soothing effect.

After-sun lotions formulated with calming ingredients like chamomile, green tea extract, or panthenol are also worth keeping in your routine. These help repair the skin’s barrier, reduce inflammation, and prep your skin for the next day.

Common Tanning Myths for Sensitive Skin

Misinformation about tanning runs rampant—and for people with sensitive skin, following the wrong advice can lead to real harm.

Debunking the “Base Tan” Myth

The idea that a “base tan” protects your skin from further burning is one of the most persistent myths in skincare. A tan, including a base tan, only provides roughly SPF 3 protection. That’s nowhere near enough to prevent damage.

According to the Skin Cancer Foundation, there is no such thing as a safe tan from UV exposure—any darkening of the skin is a sign that damage has already occurred. Sensitive skin is especially vulnerable to this cumulative damage.

Why Burning Does Not Lead to Tanning

Many people assume that burning is just the first step toward a tan. This isn’t how it works. Burning and tanning are two separate biological responses to UV radiation. Burning is an inflammatory reaction caused by excessive UV exposure. Tanning is the skin’s attempt to protect itself by producing more melanin.

For people with sensitive skin, the inflammatory response often dominates—meaning burns are more likely than tans. Protecting your skin with sunscreen doesn’t prevent tanning; it prevents burning while still allowing gradual, safer color to develop.

Your Sensitive Skin Tanning Questions Answered

Can sensitive skin tan without burning?

Yes—with the right precautions. Short periods of morning sun, combined with broad-spectrum SPF 30–50, allow gradual melanin production without the inflammatory response that causes burning.

What’s the safest way to get a tan with sensitive skin?

Self-tanners are the safest option. They deliver color without any UV exposure. Look for fragrance-free, DHA-based formulas designed for reactive skin types.

How often should I reapply sunscreen when tanning outdoors?

Reapply every two hours, or immediately after swimming or heavy sweating—even if the label says “water-resistant.”

Can I use after-sun lotion every day?

Yes. After-sun lotions containing aloe vera, chamomile, or panthenol are gentle enough for daily use and help maintain the skin’s moisture barrier year-round.

Will moisturizing really make my tan last longer?

It does. Tanned skin fades as the outer skin cells shed. Keeping the skin well-hydrated slows this process, helping your tan last days longer than it otherwise would.

Embrace a Sun-Kissed Look Safely

Sensitive skin and a beautiful tan aren’t mutually exclusive. The key lies in preparation, protection, and patience. Choose the right sunscreen, limit your UV exposure to safer hours, explore self-tanners for a no-risk glow, and take care of your skin before and after time in the sun. Avoid the myths that could lead you astray—and remember that a healthy complexion always looks better than a painful burn.

Ready to glow? Visit Broad Ripple Tans in Indianapolis for the best tanning deals and services around town. Whether you’re looking for professional spray tans, self-tanning products, or expert advice tailored to your skin type, the team at Broad Ripple Tans has you covered.

View Our Tanning Coupons

Related Posts:

How to Calm Down Redness of the Skin After Tanning
Your Ultimate Guide to Post-Tanning Skin Care
Relief for Sunburned Skin: Simple Steps for Healing and Prevention

How to Build a Base Tan: Tips for Safe, Even Summer Color

Summer is coming, and if you want to step into the sun with confidence, building a base tan is one of the smartest ways to prepare your skin for the season ahead. A base tan helps your skin adjust to UV exposure gradually, reducing the risk of burns and setting the stage for a deeper, more even color throughout the summer.

But there’s a right way and a wrong way to get there. Skip the preparation, rush the process, or skip sun protection entirely, and you’re more likely to end up burned than bronzed. This guide walks you through everything you need to know—from prepping your skin to maintaining that golden glow—so you can tan smart and stay healthy.

Building a Base Tan
Building a Base Tan

What Is a Base Tan?

A base tan is a light layer of color built up gradually over time through repeated, controlled UV exposure. It’s the foundation your skin develops before a vacation, outdoor event, or the height of summer—essentially giving your complexion a head start before more intense sun exposure hits.

When your skin is exposed to UV rays, it produces melanin, the pigment responsible for tanning. A base tan signals that melanin production is already underway, which can help your skin respond more evenly to continued sun exposure.

Does a Base Tan Actually Protect You?

This is worth addressing directly, because the science is nuanced. According to Harvard Health, a base tan offers roughly the equivalent of SPF 3 to 4—minimal protection that won’t prevent sunburn on its own. So while a base tan is a helpful starting point, it is not a substitute for sunscreen.

Think of it as a warm-up, not a shield. Your skin is more prepared, but it still needs protection.

Preparing Your Skin for a Base Tan

Getting a great tan starts before you ever step into the sun. The condition of your skin plays a significant role in how evenly and deeply color develops.

Exfoliate for an Even Canvas

Dead skin cells on the surface can cause color to develop unevenly or fade in patches. Exfoliate your skin two to three days before you begin tanning—gently scrubbing your elbows, knees, and any other rough patches will give you a smoother, more receptive surface for UV exposure.

Avoid exfoliating immediately before a tanning session, as freshly scrubbed skin can be more sensitive.

Hydration Is Everything

Dry skin tans poorly and fades fast. Keeping your skin well-hydrated—both by drinking plenty of water and applying a good moisturizer daily—helps your tan develop more evenly and stick around longer. Look for lotions with ingredients like aloe vera, shea butter, or vitamin E, which nourish skin without interfering with UV absorption.

Apply Sunscreen Before You Go Outside

Yes, even when you’re trying to tan. Sunscreen doesn’t prevent your skin from developing color—it prevents you from burning, which is counterproductive and harmful. Apply a broad-spectrum SPF 30 to exposed areas, allow it to absorb fully, and reapply every two hours when spending extended time outdoors.

Building Your Base Tan Safely

The key to a beautiful base tan is patience. Rushing the process leads to burns, peeling, and uneven color.

Gradual Sun Exposure: Slow and Steady

Start with short sessions—15 to 20 minutes in the sun during off-peak hours (before 10 a.m. or after 4 p.m., when UV intensity is lower). Gradually increase your exposure over one to two weeks, allowing your skin time to adapt between sessions. Leave at least 48 hours between tanning sessions to let melanin fully develop.

This steady approach not only reduces the risk of burning but produces a more uniform, lasting color.

Indoor Tanning Options

For those who want more control over the process, indoor tanning can be an effective way to build a base tan before vacation or a busy outdoor season.

Tanning Beds: What to Know

Tanning beds deliver controlled UV exposure in a consistent environment, making it easier to manage session length and intensity. Beginners should always start with shorter sessions—typically 5 to 7 minutes in a lower-level bed—and work up gradually. Allow 48 hours between visits and always use a tanning-specific lotion designed for bed use.

If you’re in Indianapolis and looking for a premium indoor tanning experience, Broad Ripple Tans on Broad Ripple Ave is the place to go. With a range of tanning bed options, spray tan services, and their new luxury infrared beds, Broad Ripple Tans offers some of the best indoor tanning discounts in the city. You can also shop our selection of professional tanning lotions and products to maximize your results. Give us a call at 317-257-8262 or stop in today.

Spray Tans: An Instant Glow

If UV exposure isn’t for you, a professional spray tan offers a safe, effective way to achieve that sun-kissed look without any UV risk. Modern spray tans are a far cry from the orange streaks of the past—when applied professionally, they produce a natural-looking, even color that develops within hours. For those with fair or sensitive skin, a spray tan can be an excellent base before a beach holiday, providing the appearance of color without any UV exposure at all.

Tanning Lotions and Products

The right products can significantly improve the quality and longevity of your tan. Tanning accelerators, bronzers, and after-tan moisturizers are all designed to support the tanning process and keep your color looking its best. Tanning accelerators, for example, contain ingredients like tyrosine that support melanin production. Always choose products appropriate for your skin type and tanning method—bed-specific lotions differ from those designed for outdoor use.

Maintaining Your Golden Glow

Once you’ve built your base tan, a little consistent care will keep it looking fresh for weeks.

Post-Tan Skin Care

After each session, apply a rich, hydrating moisturizer while your skin is still slightly warm. This locks in moisture and helps your tan last longer. Avoid exfoliating immediately after tanning—wait a few days to allow color to fully develop before sloughing off any surface cells.

Extending the Life of Your Tan

Short, regular top-up sessions are far more effective than infrequent long ones. If you’re maintaining a tan throughout the summer, aim for short sun or bed sessions every few days rather than lengthy exposures once a week. Continue moisturizing daily—hydrated skin holds color significantly longer than dry skin.

Safe Long-Term Tanning Practices

Long-term skin health should always be the priority. Wear sunscreen every time you’re outdoors, even on cloudy days. Stay out of the sun during peak UV hours. Get regular skin checks and monitor moles or spots for any changes. Tanning responsibly means enjoying the benefits of that sun-kissed glow while minimizing cumulative UV damage over time.

Frequently Asked Questions About Base Tans

Is a base tan truly protective?

A base tan provides very minimal UV protection—roughly equivalent to SPF 3 to 4, according to Harvard Health. It should never replace sunscreen. Think of it as a starting point, not a barrier.

How long does it take to build a base tan?

Most people can build a noticeable base tan in one to two weeks with consistent, gradual exposure. Fair-skinned individuals may take a little longer and should be especially careful to avoid overexposure early on.

Can I get a base tan with self-tanner?

Self-tanners color the outer layer of the skin using DHA (dihydroxyacetone) and do not involve UV exposure. They are the safest way to achieve a tan-like appearance, though the color they produce does not affect the skin’s UV response the way a true melanin-based tan does.

What should I wear when building a base tan outdoors?

Lightweight, breathable clothing protects areas you don’t want to tan. Wear a wide-brimmed hat and UV-protective sunglasses to protect your face and eyes, and apply SPF 30 to any exposed areas.

Start Your Summer Glow the Smart Way

A base tan is one of the best investments you can make before a summer full of sunshine. Build it gradually, prep your skin properly, and protect it throughout the process—and you’ll have a healthy, even color that lasts well into the season.

Ready to get started? Visit Broad Ripple Tans in Indianapolis for expert guidance, top-tier tanning beds, luxurious new infrared beds, spray tan services, and a full range of professional tanning products.

View Our Tanning Prices

Related Post: How to Deepen an Existing Tan for a Flawless, Lasting Glow

How to Deepen an Existing Tan for a Flawless, Lasting Glow

Sunshine on your skin feels incredible, and building a beautiful base tan can boost your confidence. Once you have that initial glow, you might want to take it a step further. Deepening an existing tan requires a careful balance of skin care, safe exposure, and healthy habits.

Rushing the process can leave you with a painful reminder of overexposure, such as a sunburn or peeling skin. A deep, rich tan takes a little patience, but the results are always worth the effort. By focusing on skin health and strategic tanning methods, you can achieve a darker shade safely and effectively.

This guide will walk you through the most effective ways to enhance your color. You will learn how to prepare your skin, which products to use, and how dietary choices can naturally boost your radiance.

Deepen Your Tan in Indianapolis

Preparing Your Skin for a Deeper Tan

A lasting tan starts long before you step into the sunlight or a tanning bed. Proper skin preparation ensures that your color develops evenly and adheres to fresh, healthy skin cells.

Gentle exfoliation for even skin

Dead skin cells can build up on the surface of your body, creating a barrier that prevents UV rays or tanning products from penetrating evenly. Gentle exfoliation removes this dull layer. Use a mild body scrub or an exfoliating mitt a day before you plan to tan. This step ensures that your color develops on fresh skin, making your tan look smoother and last significantly longer.

Moisturize for lasting radiance

Hydration is the foundation of healthy, glowing skin. Dry skin tends to flake off quickly, taking your hard-earned tan with it. Apply a rich, nourishing moisturizer daily to keep your skin soft and supple. Well-moisturized skin absorbs UV light more effectively and holds onto color better. Focus on areas that tend to dry out quickly, such as your elbows, knees, and ankles.

Smart Tanning Strategies

Building a darker tan requires a methodical approach. Overexposing your skin can cause damage and set your progress back by causing your skin to peel.

Gradual sun exposure

The most effective way to deepen your color safely is through gradual exposure. Spending short, consistent amounts of time in the sun or a tanning bed allows your skin to produce melanin steadily. Start with brief sessions and slowly increase your time as your skin adjusts. This method prevents burning and helps you build a deep, resilient tan that will not fade after just a few days.

Utilizing tanning lotions and accelerators

Tanning accelerators and lotions are powerful tools for deepening your color. These products contain ingredients that stimulate melanin production, helping you achieve a darker shade in less time. Tinglers, bronzers, and intensifiers can all boost your results. Applying a high-quality accelerator right before your tanning session maximizes your skin’s ability to absorb UV rays and develop a rich, dark hue.

The Role of Diet and Hydration

What you put into your body plays a major role in how your skin looks on the outside. Certain foods and proper hydration can naturally enhance your complexion.

Foods that support skin health

Consuming a diet rich in specific vitamins can naturally warm up your skin tone. Beta-carotene is a powerful nutrient known for giving skin a healthy, sun-kissed appearance. You can find high levels of beta-carotene in carrots, sweet potatoes, spinach, and cantaloupe. Incorporating these foods into your daily meals provides a natural boost to your tan from the inside out.

Staying hydrated for a vibrant tan

Drinking plenty of water is essential for maintaining a deep tan. When your body is properly hydrated, your skin cells remain plump and healthy. This helps your tan look vibrant and prevents your skin from drying out and shedding prematurely. Aim to drink at least eight glasses of water a day, especially on days you spend time tanning or outdoors.

Maintaining and Extending Your Tan

Once you have achieved your desired shade of bronze, the next step is keeping it around for as long as possible. A solid after-care routine is crucial for tan longevity.

Post-tan skincare routine

After you tan, your skin needs immediate nourishment. Use a tan extender or a specialized after-sun lotion to lock in the color and soothe your skin. These products are formulated with hydrating ingredients like aloe vera and vitamin E, which help repair the skin barrier and prolong the life of your tan.

Avoiding tan-fading habits

Certain daily habits can strip your color away faster than you might realize. Hot showers, for example, can dry out your skin and cause it to flake. Opt for lukewarm water instead. Additionally, avoid harsh soaps or body washes containing heavy chemicals and sulfates, as these can strip away your skin’s natural oils and accelerate the fading process.

Frequently Asked Questions (FAQ)

How long does it take to see results?

Seeing a noticeably deeper tan usually takes a few consistent sessions over the course of a week or two. Gradual exposure builds melanin safely, so patience is key. Rushing the process increases the risk of sunburn, which will ultimately ruin your tan.

Can I deepen an artificial tan?

Yes, you can deepen a spray tan or self-tanner. You can apply a second layer of self-tanner two days after your initial application. Ensure you lightly exfoliate any dry patches before reapplying, and always use a high-quality product to avoid an orange or streaky finish.

What should I do if my tan is uneven?

If your tan develops unevenly, gentle exfoliation is the best remedy. Focus on the darker, blotchy areas with a body scrub to help even out the tone. Moving forward, make sure your skin is thoroughly moisturized before tanning to prevent dry patches from absorbing too much color.

Keep Your Tan Radiant

Achieving a deep, beautiful tan takes a little dedication, but the radiant results speak for themselves. By prepping your skin thoroughly, practicing smart tanning habits, and fueling your body with the right nutrients, you can build a stunning, long-lasting glow. Remember to prioritize your skin’s health above all else. A well-hydrated, cared-for complexion will always hold color beautifully.

Ready to take your glow to the next level? Visit Broad Ripple Tans in Indianapolis for an upscale tanning experience at neighborhood prices. Whether you are looking for automated VersaSpa® spray tan booths, high-pressured stand-up beds, or ultra-bronzing mega beds, we have the perfect luxury equipment to deepen your existing tan.

View Our Tanning Options

Related Post: Extending Your Summer Tan: A Tanning Lover’s Guide to a Never-Ending Glow

Achieving an Even Glow: Your Guide to Fixing a Patchy Spray Tan

You step out of the shower a few days after your tanning appointment, hoping to see a golden, sun-kissed finish. Instead, you notice awkward white circles around your joints and dark streaks on your legs. A blotchy spray tan can easily ruin your confidence and leave you feeling self-conscious.

Most fake tans start to fade unevenly due to skin dryness, incorrect preparation, or friction. The outermost layer of your skin naturally sheds at different rates across your body. When the tanning solution clings to those shedding cells, uneven fading becomes a highly visible problem.

Fortunately, you do not have to hide under long sleeves for the next week. You can actively correct these stubborn streaks and restore your smooth bronze color. Keep reading to learn exactly how to fix a patchy spray tan with simple, effective techniques that protect your skin and restore your glow.

Patchy Spray Tan Solutions

Immediate Action: First Steps to Even Out a Patchy Tan

When you first notice uneven spots, your instinct might be to scrub your skin vigorously. This aggressive approach will likely cause irritation and make the patchiness much worse. Instead, try these gentle methods to correct the issue.

Gentle Exfoliation Techniques

Exfoliation remains one of the best ways to soften harsh lines and remove excess color. Reach for a soft exfoliating mitt or a mild body scrub. Gently buff the skin in circular motions, focusing heavily on areas where the tan looks the darkest, such as the elbows, knees, and ankles. This light pressure will help blend the dark areas into the lighter ones without stripping the entire tan away.

Hydration is Key

Dry skin is a leading cause of a patchy spray tan. Areas that lack moisture naturally shed skin cells much faster than well-hydrated spots. To slow down this process, apply a generous amount of an oil-free, tan-safe moisturizer every day. Keeping your skin highly hydrated smooths out the texture, which helps the remaining color fade at a much more consistent and natural rate.

Targeted Tan Removers

If simple exfoliation does not do the trick, consider using a commercial sunless tan remover. These specialized formulas are designed to gently break down the active tanning ingredient, dihydroxyacetone (DHA). Apply the remover foam strictly to the heavily pigmented patches, wait a few minutes as directed, and gently wipe it away.

Advanced Solutions for Persistent Patchiness

Sometimes, a bad spray tan requires a bit more finesse to fix. If you still have glaring white spots or deep streaks, you can manually fill in the gaps.

The Art of Layering Self-Tanner

If your tan has faded heavily in certain areas, you can strategically add color back in. Take a small amount of your favorite at-home self-tanning mousse and apply it to a fluffy makeup brush. Lightly sweep the brush over the pale patches, carefully blending the edges into your existing tan. Let the product develop for a few hours before gently rinsing it off.

Using Bronzing Mousses and Lotions

Gradual tanning lotions provide an excellent way to maintain color balance. These products contain a very low concentration of DHA. Applying a gradual tanner over your entire body helps seamlessly merge the dark and light areas over the course of a few days. It is a foolproof method to revive a fading spray tan.

Professional Correction Options

If your tan is severely streaked and you have a major event approaching, seek out a professional. A skilled spray tan artist can evaluate your skin and apply a corrective layer of solution to mask the flaws. They know exactly how to adjust the spray gun pressure and solution undertone to fix the mistakes of a previous application.

Prevention is Better Than Cure: Avoiding Future Tan Troubles

The easiest way to fix a patchy spray tan is to prevent it from happening in the first place. Proper preparation and aftercare guarantee a much smoother result.

Pre-Tan Preparation Essentials

A flawless tan requires a clean, perfectly smooth canvas. You must exfoliate your entire body 24 to 48 hours before your tanning appointment to remove all dead skin cells. On the day of your spray tan session, avoid applying any deodorant, perfumes, or body lotions. These products create an invisible barrier on your skin that completely blocks the tanning solution from absorbing evenly.

Post-Tan Care for Longevity

What you do immediately after your appointment determines how your tan will fade. Wear loose, breathable clothing to prevent friction from rubbing the color off. When you take your first shower, use lukewarm water and avoid harsh bar soaps. Always pat your skin dry with a soft towel, as rubbing forcefully will wipe away the freshly developed color.

Choosing the Right Spray Tan

Every skin type reacts differently to tanning formulas. A solution with too high of a DHA concentration can cause the skin to look dry and crack rapidly. Consult with your tanning professional about your skin type and natural undertones to ensure they use a formula perfectly suited to your body.

DIY Remedies for a Quick Fix

If you find yourself with a blotchy spray tan and no commercial removers on hand, your kitchen pantry holds several highly effective solutions.

Lemon Juice and Baking Soda Method

Lemon juice contains natural acids that lighten the skin, while baking soda provides a gentle, gritty texture for exfoliation. Mix a few tablespoons of baking soda with a splash of fresh lemon juice until it forms a thick paste. Rub this mixture directly onto the dark patches, let it sit for roughly three minutes, and wash it away with warm water.

Olive Oil and Sugar Scrub

Oils naturally break down the bonds of a fake tan. Combine a few spoonfuls of olive oil with brown sugar to create a deeply hydrating body scrub. Massage the scrub over the streaky areas before hopping into the shower. The sugar gently buffs away the color, while the olive oil softens the skin to prevent further flaking.

Frequently Asked Questions (FAQ)

How long does a spray tan last?

A professional spray tan typically lasts between 7 and 10 days. The longevity heavily depends on your skin type, how well you prepped beforehand, and how consistently you moisturize afterward.

Can I swim after a spray tan?

You should absolutely avoid swimming in chlorinated pools or saltwater for the first 24 hours while your tan develops. Even after development, frequent swimming will cause your tan to fade rapidly, as chlorine is a harsh chemical that actively strips away the bronzed layer.

What causes a spray tan to go patchy?

A spray tan goes patchy when the outer layer of your skin sheds at an uneven pace. Common culprits include severe skin dehydration, heavy sweating, friction from tight clothing, and failing to exfoliate dead skin cells prior to the application.

Embrace a Flawless Tan with Confidence

A blotchy spray tan is certainly annoying, but it is highly treatable. By combining targeted exfoliation with deep hydration, you can easily smooth out any awkward streaks and reclaim your beautiful bronze glow. Taking the time to properly prep your skin before your next appointment will ensure you never have to deal with uneven fading again.

If you’re seeking quality indoor tanning services in the Broad Ripple, Indiana area, we invite you to explore our selection of tanning coupons and packages to find the perfect option for your needs.

View Our Tanning Deals

Related Post: Erasing Mistakes: How to Correct a Blotchy Spray Tan

The Golden Rule: Achieving a Natural-Looking Tan Every Time

A sun-kissed glow feels incredible, but achieving that perfect bronzed look can sometimes feel like a daunting task. Sunburns and sun damage are real risks of prolonged UV exposure, leading many people to seek safer alternatives. Achieving a flawless, natural glow is the ultimate confidence booster, yet the fear of looking streaky or orange often holds people back.

Understanding how skin reacts to different tanning methods is crucial for maintaining healthy skin and a beautiful complexion. Preparation, application, and maintenance all play critical roles in the final result. A great tan does not happen by accident. It requires a thoughtful approach to skincare and an understanding of the available options.

This guide will walk you through the essential steps to secure a realistic, beautiful tan. By following these expert tips for a natural looking tan prep application maintenance, you can enjoy a radiant appearance safely and confidently all year long.

Get a Natural-Looking Tan at Broad Ripple Tans in Indy!

Preparation is Key: The Foundation of a Flawless Tan

Your skin is a canvas. If that canvas is rough or dry, the final masterpiece will look uneven. Proper preparation is the most important step in any tanning routine.

Exfoliate to Remove Dead Skin

You should always exfoliate at least 24 hours before your tanning session. Removing dead skin cells creates a smooth base for the tan to adhere to. Pay special attention to rough areas like your elbows, knees, and ankles. These dry spots tend to absorb more tanning solution, which can lead to dark, unnatural patches. A light, oil-free scrub works best, as heavy oils can leave a residue that acts as a barrier to the tan.

Moisturize the Right Way

Hydration is vital, but timing matters. Apply a light, oil-free moisturizer to those notoriously dry areas right before your spray tan or self-tanner application. This prevents the solution from clinging to dry patches. Avoid applying heavy lotions all over your body immediately before tanning, as this will prevent the active ingredients from developing properly on your skin.

Choosing the Right Method: Pros and Cons

Selecting the best way to tan depends on your skin type, schedule, and desired results. Here is a look at the indoor tanning vs automated spray tan vs self tanner pros and cons.

Indoor Tanning

Indoor tanning beds offer a controlled environment to build a base tan gradually. They provide quick sessions and mimic the natural tanning process of the sun. However, it is essential to follow safety guidelines and limit exposure times to avoid skin damage. Moderation and proper protective lotions are necessary.

Automated Spray Tan Beds

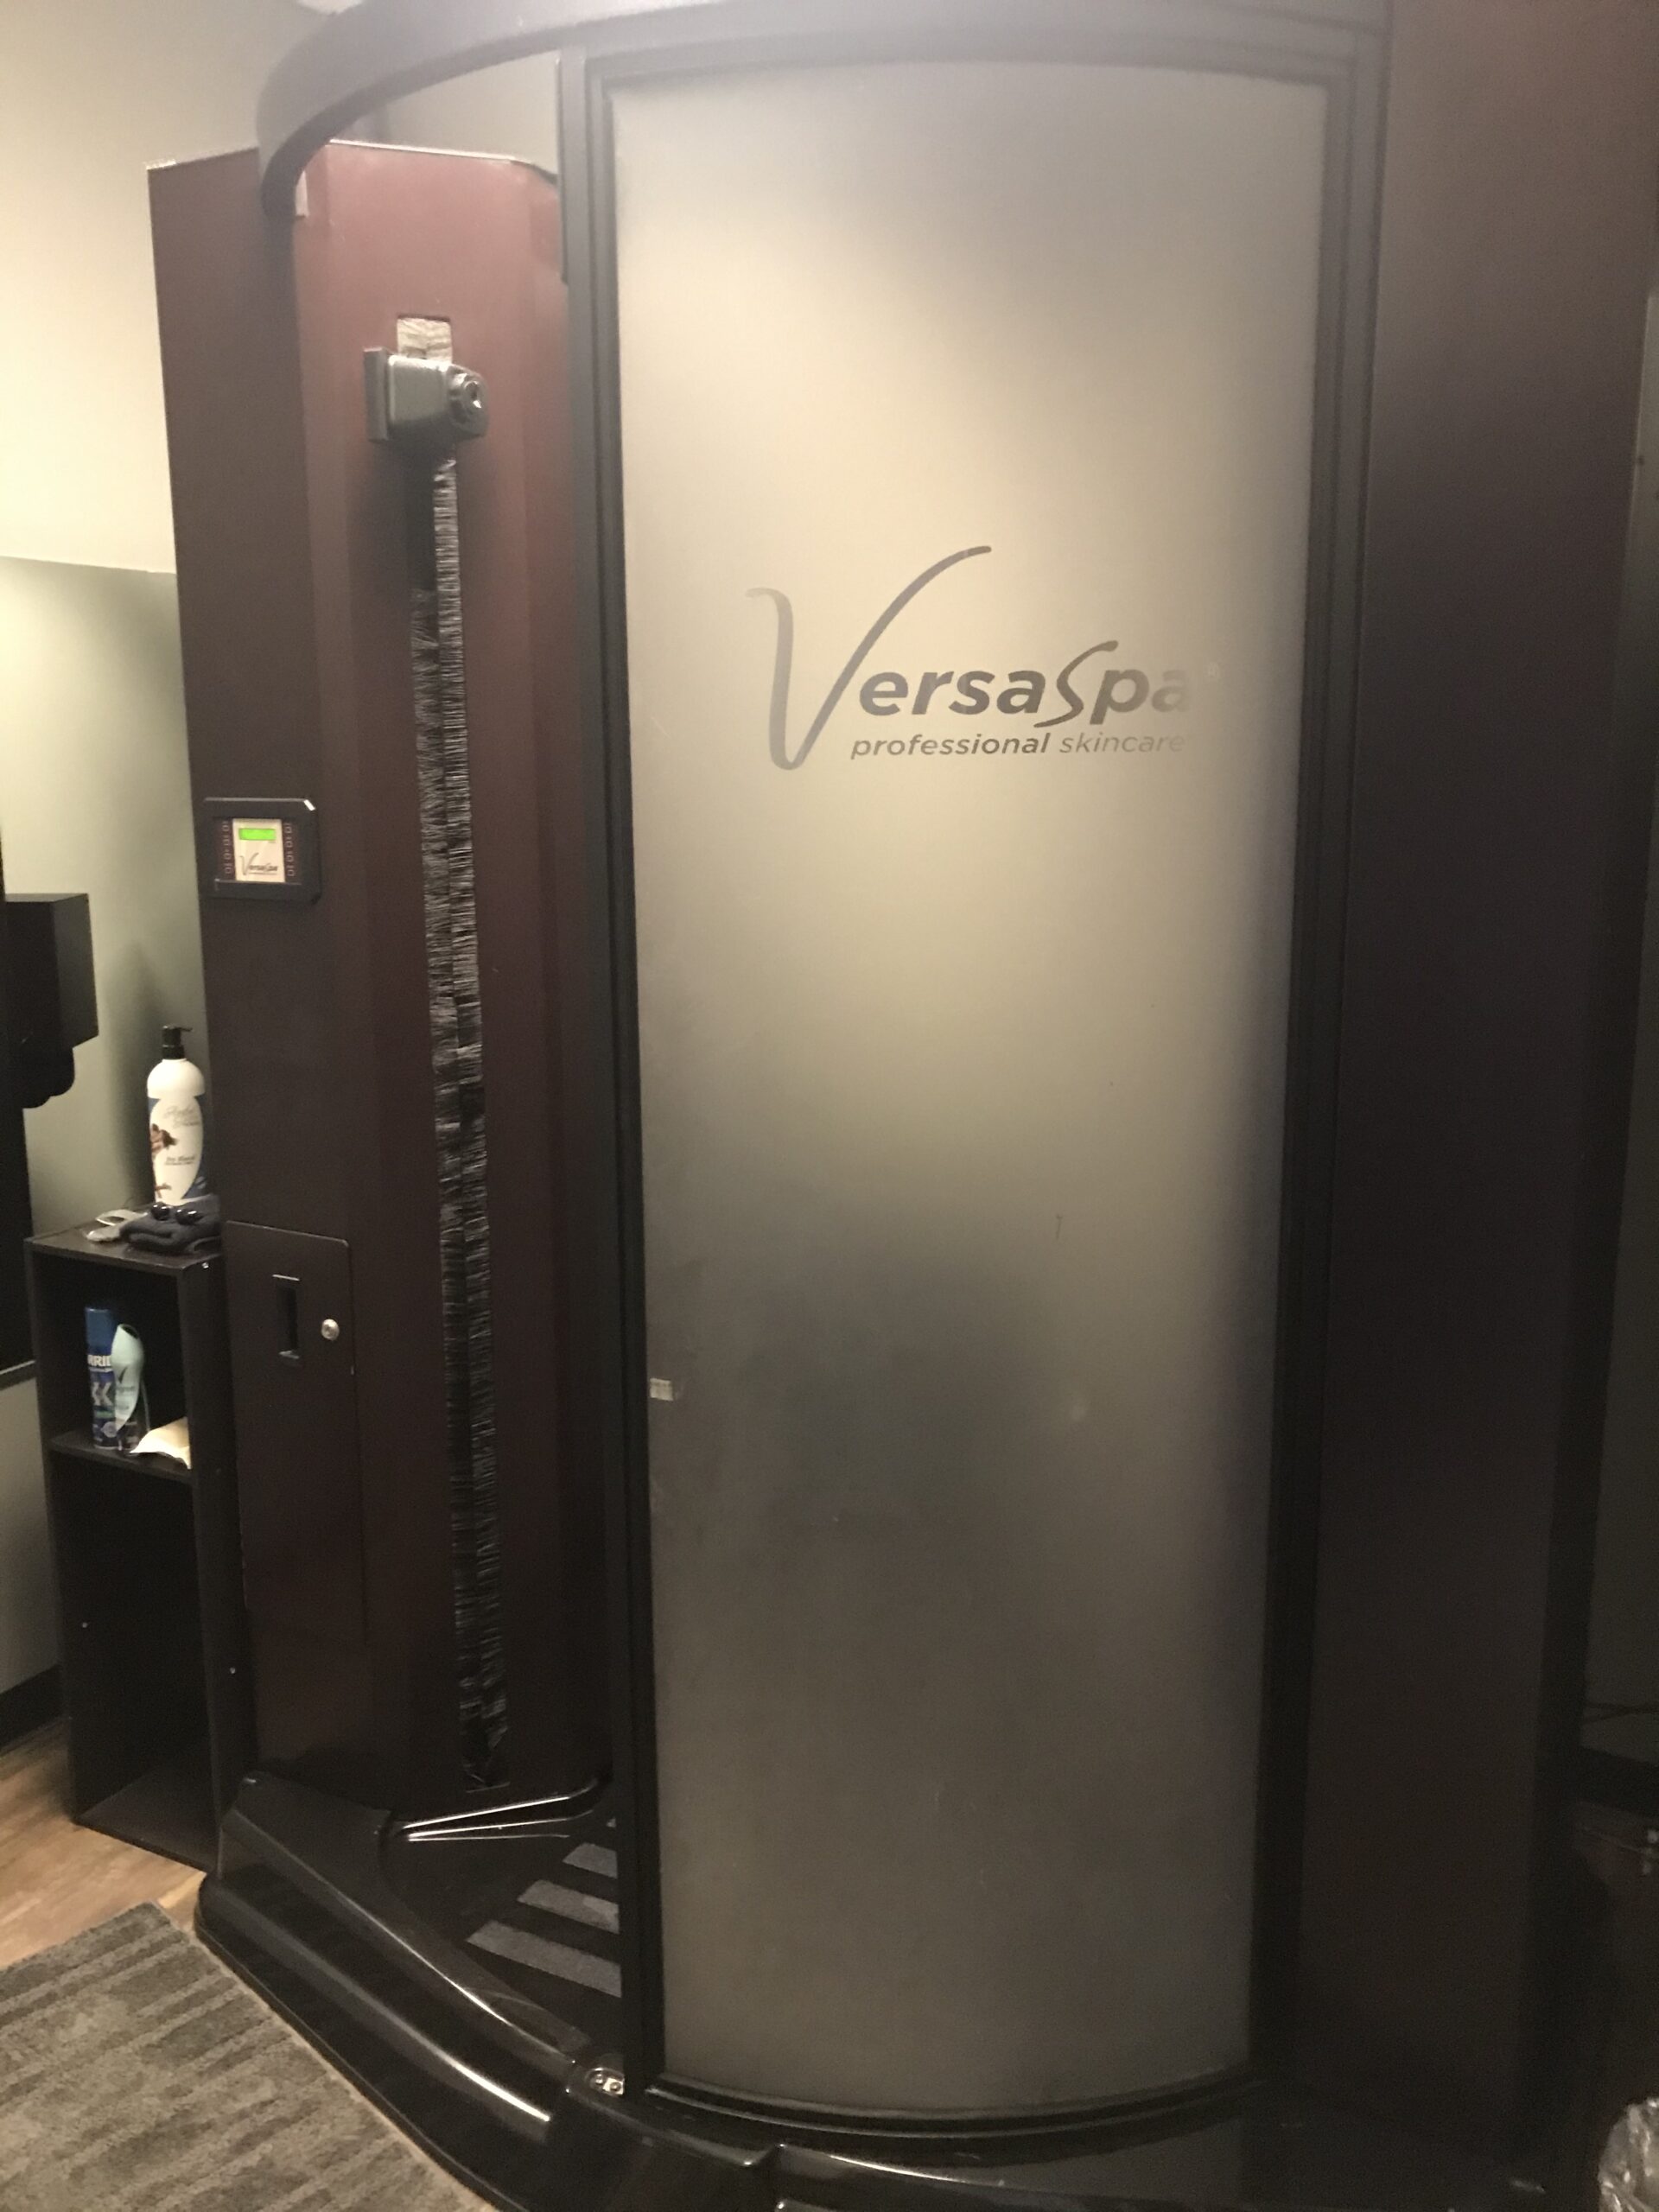
Automated spray tanning offers an instant, even glow without UV exposure. Systems like Mystic Tan and VersaSpa deliver a fine mist of tanning solution over the entire body. Mystic Tan uses a magnetic sweep technology to attract the solution to your skin, often requiring only one turn.

VersaSpa provides a heated, comfortable environment with voice instructions guiding you through a few poses for complete coverage. Both automated spray beds offer incredible benefits, including privacy, speed, and consistently natural-looking results.

Try Our VersaSpa Spray Tanning Beds in Broad Ripple!

At-Home Self-Tanners

Self-tanners are convenient and budget-friendly. They come in mousses, lotions, and sprays. While they offer complete control over your routine, they also carry the highest risk of user error. Streaks, missed spots, and stained palms are common pitfalls for beginners.

Professional Tips for Application

Applying your tan correctly is what separates a realistic glow from an artificial-looking disaster.

Avoiding the Dreaded Orange Tone

Nobody wants an orange tan. This usually happens for three reasons: poor skin prep, using a solution that is too dark for your natural skin tone, or leaving a rapid solution on for too long. To avoid orange, choose a shade that closely matches your natural undertones. If you are fair, start with a light or medium shade. Always follow the specific timing instructions provided by the manufacturer or your tanning technician.

Achieving an Even Finish

When using automated spray beds, listen carefully to the voice prompts and hold the recommended poses. If you are applying self-tanner at home, always use a tanning mitt. Blend the product in sweeping, circular motions. Use only the residual product left on the mitt for your hands, feet, and face.

Maintaining Your Glow: Aftercare Secrets

A beautiful tan requires ongoing care. How long does a spray tan last and maintenance tips are some of the most common questions tanning professionals hear. Typically, a spray tan lasts between 5 to 10 days, depending on your skin type and care routine.

Hydration is Essential

Keep your skin moisturized to extend the life of your tan. Apply a daily lotion to lock in hydration. Avoid hot showers, harsh soaps, and heavy exfoliation, as these will strip the color away prematurely. When drying off after a shower, gently pat your skin with a towel instead of rubbing.

Frequently Asked Questions

How long should I wait to shower after a spray tan?

Typically, you should wait 8 to 12 hours before showering to allow the tan to fully develop. If you use a rapid solution, this time drops to 1 to 4 hours, depending on the desired darkness.

Will a spray tan protect me from the sun?

No. Spray tans and self-tanners do not contain sunscreen and offer no protection against UV rays. You must still apply SPF when spending time outdoors.

What should I wear to my tanning appointment?

Wear loose-fitting, dark clothing to your appointment. Tight clothes like yoga pants or tight bras can rub the tanning solution off your skin before it has a chance to develop.

Ready to Elevate Your Glow?

Achieving a flawless, natural-looking tan comes down to proper preparation, choosing the right method, and maintaining your skin with dedicated aftercare. By following these guidelines, you can enjoy a beautiful, radiant complexion without the worry of streaks or orange tones.

If you want guaranteed, professional results, we are here to help. Book your session for the best indoor tanning and spray tanning in Broad Ripple, Indiana. Check out our automated spray tan beds and let our experts guide you to your perfect glow today!

View Our Tanning Packages

Related Post: 10 Tips to Maximize Your Indoor Tanning Experience

Meditate While You Tan: Mantras for Indoor Tanning

TL;DR: Transform your tanning session into a mindful wellness ritual with simple breathing techniques, calming mantras, and visualization exercises. Learn how to stay relaxed and centered during indoor tanning while prioritizing safety.

Key Takeaways:

  • Tanning beds provide a quiet, warm environment suitable for brief meditation practices
  • Controlled breathing exercises can reduce anxiety and enhance relaxation during your session
  • Simple mantras and visualizations help you stay present and calm
  • Safety remains the top priority—always wear protective eyewear and follow time limits

Table of Contents:

  1. Why Practice Meditation in a Tanning Bed?
  2. Top 3 Meditation Mantras for Tanning Success
  3. Breathing Techniques for Warm Environments
  4. Visualization Exercises for Your Session
  5. Benefits of Combining UV Light and Mindfulness
  6. Frequently Asked Questions
  7. Quick Recap
  8. Local Tanning Salon in Broad Ripple
Tanning Bed Meditation

Why Practice Meditation in a Tanning Bed?

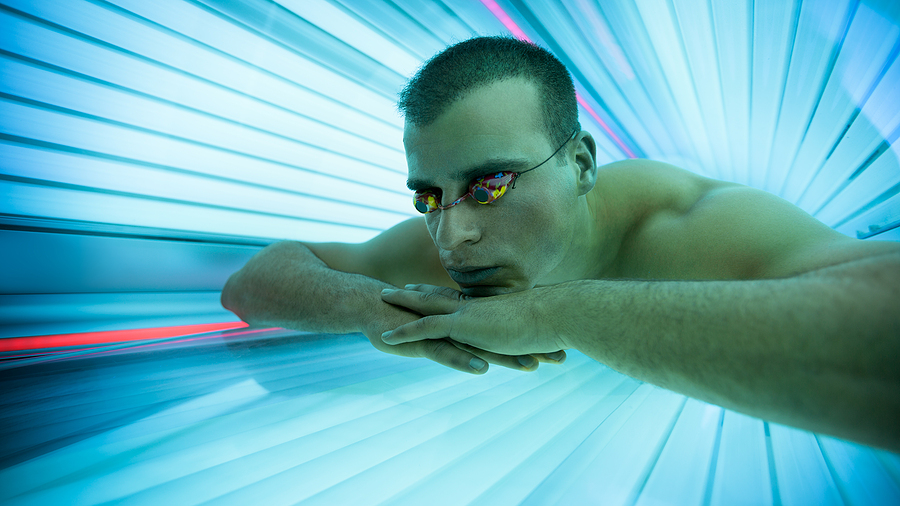
Tanning beds offer a unique environment for brief meditation: a warm, enclosed space with minimal distractions and a predetermined time limit.

Most tanning sessions last between 5 and 15 minutes, making them an ideal timeframe for focused breathing exercises or mantra repetition. The warmth can help your muscles relax, while the quiet environment allows you to turn inward without external interruptions.

However, the heat and enclosed nature of tanning beds require adapted techniques. You’ll want to focus on practices that keep you calm without raising your body temperature further or causing you to lose track of time.

Understanding your body’s response to warmth is essential. Some people find heat naturally relaxing, while others may feel restless. Start with shorter sessions and simpler techniques until you know what works best for you.

Top 3 Meditation Mantras for Tanning Success

Simple, repetitive phrases help anchor your attention during your tanning session. Choose one that resonates with your intention for the day.

1. “I am calm and present”

This mantra keeps you grounded in the moment. Repeat it slowly with each breath—inhale on “I am calm,” exhale on “and present.” The simplicity prevents your mind from wandering while acknowledging your current state.

2. “Warmth flows through me”

This phrase helps you stay connected to the physical sensation of heat without resistance. Rather than fighting the temperature, you accept it as part of the experience. Repeat it in rhythm with your natural breathing pattern.

3. “I release tension with each breath”

Focusing on release rather than acquisition can be particularly effective in confined spaces. As you exhale, imagine stress leaving your body. This mantra pairs well with progressive muscle relaxation, where you systematically release tension from different muscle groups.

Keep your chosen mantra consistent throughout your session. Switching between phrases can distract from the calming effect you’re trying to achieve.

Breathing Techniques for Warm Environments

Controlled breathing exercises can significantly reduce anxiety and help regulate your body’s response to warmth.

Cyclic Sighing

Stanford Medicine researchers found that just five minutes of controlled breathing exercises can reduce overall anxiety and improve mood. Cyclic sighing emphasizes long exhalations, which activate your parasympathetic nervous system and promote calmness.

Here’s how to practice it during your tanning session:

  1. Breathe in slowly through your nose, filling your lungs comfortably
  2. Take a second, deeper breath to expand your lungs fully
  3. Exhale very slowly through your mouth until all air is released
  4. Pause briefly before beginning the next cycle

This technique naturally slows your breathing rate, creating a lasting sense of calm that extends beyond your tanning session.

Box Breathing

Also known as square breathing, this method creates an even rhythm that’s easy to maintain:

  1. Inhale through your nose for a count of four
  2. Hold your breath for four counts
  3. Exhale through your mouth for four counts
  4. Hold empty for four counts
  5. Repeat

The equal timing creates a meditative rhythm that helps prevent your mind from wandering. Adjust the count to three or five if four feels uncomfortable in the warm environment.

Nasal Breathing

Breathing exclusively through your nose can help regulate body temperature and filter the air more effectively. It also naturally slows your breath rate compared to mouth breathing, which promotes relaxation.

If you find yourself feeling too warm, slow your breathing rate rather than breathing more rapidly, which can increase feelings of anxiety.

Visualization Exercises for Your Session

Mental imagery can transport you beyond the physical confines of the tanning bed, creating a more enjoyable experience.

Ocean Waves

Imagine yourself lying on a warm beach. With each breath, visualize gentle waves rolling in and out. The warmth of the tanning bed becomes the sun on your skin. The hum of the equipment transforms into distant ocean sounds. This visualization pairs naturally with the physical sensations you’re already experiencing.

Golden Light

Picture a warm, golden light slowly filling your body from your toes to the crown of your head. As it moves upward, it dissolves any tension or discomfort. This exercise helps you stay connected to your body while creating a positive association with the warmth around you.

Forest Bath

Envision yourself in a sun-dappled forest clearing. Warm light filters through the leaves above you. The temperature is comfortable, and you feel completely at peace. This visualization can be particularly helpful if you feel any claustrophobia, as it mentally expands your space.

Keep your visualizations simple and sensory-focused. Complex scenarios require too much mental effort and can increase rather than decrease stress.

Benefits of Combining UV Light and Mindfulness

Call 317-257-8262 to Learn About Our Tanning Beds in Broad Ripple Indiana

Pairing mindfulness practices with your tanning routine can enhance the overall experience and help you stay within safe time limits. The warm environment of a tanning bed naturally encourages physical relaxation.

Adding intentional breathing and mental focus transforms a routine cosmetic appointment into a brief wellness practice. Many people report feeling more refreshed after combining these elements than from tanning alone.

Frequently Asked Questions

Is it safe to meditate in a tanning bed?

Meditation itself is safe, but tanning beds carry serious health risks including skin cancer, premature aging, and eye damage. Always wear FDA-approved protective eyewear during your session, follow facility time limits strictly, and never exceed recommended exposure times. If you feel overheated, dizzy, or uncomfortable, end your session immediately.

How long should I meditate during tanning?

Limit your practice to the duration of your prescribed tanning session, typically 5-15 minutes. Never extend your tanning time to continue meditating. Set a timer as a backup to the bed’s automatic shutoff, and check in with your body regularly throughout the session.

Can breathing exercises make me too relaxed and lose track of time?

This is a valid concern. Choose alerting techniques rather than deeply sedating ones. Cyclic sighing and box breathing keep you present without inducing sleepiness. Avoid body scan meditations that might cause you to drift off. Keep part of your awareness on physical sensations so you remain conscious of time passing.

What if I feel claustrophobic?

Claustrophobia can interfere with relaxation. Keep the tanning bed partially open if the facility allows it, or practice visualization exercises that mentally expand your space. If anxiety persists, tanning beds may not be the right environment for your meditation practice.

Should I use guided meditation audio during my session?

Most tanning facilities don’t allow headphones due to safety and equipment concerns. Additionally, the bed’s cooling fans create background noise that can interfere with audio. Stick with silent practices like mantra repetition or breathing techniques that don’t require external guidance.

Quick Recap:

  • Tanning beds provide 5-15 minutes of quiet time suitable for brief meditation
  • Simple mantras like “I am calm and present” help anchor your attention
  • Cyclic sighing—emphasizing long exhalations—can reduce anxiety in just five minutes
  • Visualization exercises transform the tanning experience into a mental retreat
  • Always prioritize safety: wear protective eyewear, follow time limits, and stop if uncomfortable
  • Mindfulness can help you stay aware of your body’s signals and time limits

Make Every Session Count

Transforming your tanning routine into a mindful practice can help you maximize the relaxation potential of those brief sessions. While meditation won’t eliminate the health risks associated with UV exposure, it can make your experience more intentional and help you stay within safe boundaries.

Ready to experience quality indoor tanning in Broad Ripple, Indiana? Enjoy the best packages and the latest tanning bed technologies designed for your comfort and safety. Visit us today to learn more about responsible tanning practices and find the right session length for your needs.

View Our Tanning Options

Related Post: 10 Tips on Making the Most of Your Tanning Bed Sleep Sessions

Ultimate Guide to Indoor Tanning: Tips and Techniques

TL;DR: Achieve a safe, glowing tan by prepping your skin, using the right lotions, and following professional timing guidelines.

Key Takeaways:

  • Exfoliate before your session for even results.
  • Always use indoor-specific tanning lotions.
  • Wear protective eyewear to prevent UV damage.
  • Moisturize daily to extend the life of your tan.

Table of Contents:

  1. How Should You Prepare Your Skin for Tanning?
  2. What Are the Benefits of Indoor Tanning Lotions?
  3. How Do You Choose the Right Tanning Bed?
  4. What Safety Precautions Should You Follow?
  5. How Can You Maintain Your Tan Longer?
  6. FAQ Section
  7. Quick Recap

Getting that perfect sun-kissed look shouldn’t be a guessing game. Whether you are prepping for a vacation, a special event, or just want to add a little color to your complexion during the winter months, indoor tanning offers a controlled environment to achieve your goals.

However, the key to a beautiful tan isn’t just showing up; it’s about preparation, safety, and aftercare. From understanding how UV rays interact with your skin type to selecting the right equipment, being informed is your best defense against burns and uneven color. This guide will walk you through every step of the process so you can tan smartly and safely.

Call 317-257-8262 for Luxury Tanning Deals in Broad Ripple Indianapolis

How Should You Prepare Your Skin for Tanning?

Proper preparation involves exfoliating 24 hours in advance and ensuring your skin is free of perfumes, deodorants, and makeup.

Think of your skin as a canvas. If the canvas is rough or dirty, the paint won’t apply evenly. The same logic applies to tanning. The most crucial step in preparation is exfoliation. By removing dead skin cells about 24 hours before your appointment, you ensure that the UV light penetrates fresh, healthy skin cells. This not only makes your tan look more even but also helps it last significantly longer.

On the day of your session, you need to arrive with a clean slate. Avoid wearing heavy perfumes, oil-based cosmetics, or deodorants. Many of these products contain ingredients that can react negatively to UV light, potentially leading to irritation, rashes, or white spots where the product blocked the rays. If you are coming from work or the gym, bring makeup remover wipes to clean your face and neck thoroughly before entering the tanning bed.

What Are the Benefits of Indoor Tanning Lotions?

Indoor lotions hydrate the skin, accelerate the tanning process, and are specifically formulated not to damage tanning bed acrylics.

You might be tempted to use your regular outdoor sunscreen or a drugstore moisturizer, but this is a major mistake. Outdoor lotions often contain oils (like mineral oil) that can ruin the acrylic surface of a tanning bed. This acrylic is expensive to replace, and salon owners strictly prohibit non-approved lotions for this reason.

Beyond protecting the equipment, indoor tanning lotions are scientifically designed to maximize your results. Dry skin reflects UV light, which means you are wasting your session time if your skin isn’t hydrated. Indoor lotions provide intense moisture that allows your pores to absorb UV rays more efficiently. Many also contain “accelerators” or “bronzers”—ingredients like L-tyrosine that stimulate melanin production faster than UV light alone. This means you can achieve a darker color in a shorter amount of exposure time, which is always the safer option for your skin.

How Do You Choose the Right Tanning Bed?

Selection depends on your base tan level and goals, ranging from low-pressure builds to high-pressure bronzing beds. Not all tanning beds are created equal, and knowing the difference can drastically change your results. Most salons offer levels of equipment that vary by lamp type and UV output.

  • Low-Pressure Beds (Level 1-2): These beds use traditional fluorescent bulbs that emit a balanced mix of UVA and UVB rays. UVB rays are responsible for stimulating melanin production (the pigment in your skin) but are also more likely to cause sunburn if you aren’t careful. These beds are excellent for building a “base tan” if you are starting from scratch.
  • High-Pressure Beds (Level 3-5): These units use quartz lamps and specialized filters to block out most UVB rays, delivering primarily UVA light. UVA rays oxidize the melanin you already have, turning it brown. These beds are perfect for deepening an existing tan and offer longer-lasting results, often requiring fewer visits to maintain.

If you are new to tanning, consult the salon staff. They can assess your skin type and recommend a schedule that starts with lower intensity to prevent burning.

What Safety Precautions Should You Follow?

You must wear FDA-compliant goggles, adhere to recommended exposure times, and allow 48 hours between sessions. Safety is non-negotiable when dealing with UV exposure. The most common mistake new tanners make is closing their eyes or using a towel instead of wearing protective eyewear. Your eyelids are incredibly thin and do not block UV rays effectively. Without FDA-compliant goggles, you risk long-term eye damage, including cataracts, photokeratitis (sunburn of the cornea), and night vision loss.

Secondly, respect the timer. The FDA and salon professionals set exposure limits based on your skin type to prevent injury. Never try to push for the maximum time on your first visit. Sunburn takes 6 to 48 hours to fully develop, so you won’t know you’ve overdone it until it’s too late.

Finally, patience is key. You should allow at least 24 to 48 hours between sessions. This resting period gives your skin time to produce melanin and recover from the UV exposure. Tanning too frequently doesn’t make you darker faster; it simply increases your risk of skin damage and creates a dry, peeling look.

How Can You Maintain Your Tan Longer?

Maintenance requires consistent hydration through Tan Extender lotions and avoiding long, hot showers that strip skin oils. Once you have achieved your desired color, the goal shifts to keeping it. The lifespan of a tan is directly related to the lifecycle of your skin cells. As your skin naturally exfoliates, your tan fades. To slow this process down, hydration is your best friend.

Use a high-quality “Tan Extender” moisturizer daily, preferably after you shower. These lotions often contain small amounts of bronzer to replenish color and vitamins that keep skin healthy. Conversely, avoid taking long, scorching hot showers or using harsh soaps, as these strip the natural oils from your skin and accelerate exfoliation. Pat your skin dry gently with a towel rather than rubbing it vigorously.

FAQ Section

How long does a session last?

Session times vary depending on the equipment and your skin type. A standard low-pressure bed session might last anywhere from 10 to 20 minutes, while high-pressure beds often have shorter exposure times due to their intensity. Beginners typically start with just 5 to 8 minutes.

Can I tan if I have sensitive skin?

If you have very fair skin (Type I) that burns easily and never tans, indoor tanning is generally not recommended due to the high risk of skin damage. If you have sensitive but tannable skin, you must start with very short sessions and use lotions designed for sensitive skin (often labeled “hypoallergenic”). Always consult a dermatologist if you are unsure.

Why do I have white spots on my shoulder blades?

This is caused by pressure points. When you lie in the tanning bed, your body weight restricts blood flow to the areas pressing against the acrylic (usually shoulder blades and tailbone), which reduces oxygen. Melanin needs oxygen to darken. To fix this, simply shift your body position or lift your shoulders slightly a few times during your session.

Quick Recap:

  • Exfoliate and hydrate: Prep skin 24 hours prior and avoid makeup or perfumes on the day of your session.
  • Use professional lotions: Avoid outdoor oils that damage acrylics; opt for accelerators to maximize results.
  • Protect your eyes: Always wear FDA-compliant goggles to prevent long-term vision damage.

Conclusion

Indoor tanning can be a relaxing way to achieve a vibrant look, but it requires a commitment to safety and skin care. By preparing your skin properly, respecting exposure limits, and moisturizing diligently, you can enjoy a beautiful glow while minimizing risks. Remember, a great tan is a process, not a race.

Ready for a sun-kissed glow? Check out these terrific indoor tanning deals in Broad Ripple, Indiana, to start your journey today!

View Our Tanning Deals

Related Post: The Real Benefits of Indoor Tanning

Master the Glow: Your Guide to the California Contour Tanning Shield

Achieving a golden, sun-kissed complexion is a confidence booster for many, but it often comes with a significant trade-off: the health of your facial skin. Your face is far more delicate than the rest of your body, making it susceptible to premature aging, fine lines, and sun damage when exposed to intense UV rays. For years, indoor tanners have struggled to find a balance between getting that perfect glow and protecting their most sensitive features.

Enter the California Contour Tanning Shield Face Mask. This innovative tool changes the way we approach indoor tanning by offering a solution that doesn’t force you to choose between a tan and skin health. It allows you to maintain a robust tanning routine while safeguarding the delicate T-zone, ensuring you leave the salon looking radiant, not red.

If you are tired of draping towels over your face or dealing with uneven tan lines from traditional goggles, understanding how this shield works could revolutionize your beauty regimen.

Call 317-257-8262 to Learn About Our California Contour Face Masks in Broad Ripple Indiana
Call 317-257-8262 to Learn About Our California Contour Face Masks at Our Broad Ripple Tanning Salon

What is the California Contour Tanning Shield?

The California Contour Tanning Shield is a specialized facial mask designed for use in UV tanning beds and spray tan booths. Unlike standard eye protection which covers only the eyes, this shield covers the “T-zone”—the eyes, nose, and cheekbones—where skin is thinnest and most prone to burning and wrinkling.

The genius of the design lies in its “hover” technology. The mask is engineered to sit slightly off the face, casting a soft shadow rather than pressing tight against the skin like a sticker. This distance allows UV rays or spray mist to feather naturally around the edges, creating a seamless gradient. The result is a natural-looking contour that highlights your cheekbones and jawline while keeping the sensitive center of your face protected from direct, harsh exposure.

Key Features and Benefits

The California Contour V2 is more than just a plastic mask; it is a sophisticated piece of tanning equipment built with user experience in mind. Here are the standout features that make it a favorite among skincare-conscious tanners:

Zero Tan Lines

The primary fear when using facial protection is the dreaded “raccoon eye” or harsh demarcation lines. Because the California Contour mask hovers rather than sticks, it blurs the light’s shadow. This creates a flawless blend between the protected T-zone and the tanned outer face, eliminating sharp tan lines.

Deep Lashfit Goggles

For those with eyelash extensions, traditional goggles can be a nightmare, often crushing or crimping expensive lashes. The California Contour features integrated, deep-set goggles designed specifically to accommodate long lashes without damaging them.

Universal Compatibility

Whether you prefer a lay-down luxury bed or a high-pressure stand-up booth, this shield works for you. It includes an optional thin strap that keeps the mask secure during vertical tanning sessions without interfering with the tan on the side of your face.

Protection Meets Contouring

By filtering UV rays away from the center of the face and allowing full exposure to the jawline and outer cheeks, the mask naturally sculpts your face with light. This creates a slimming, contoured effect similar to makeup, but with your natural tan.

Learn Why These Masks are a Superior Beauty Aid

How to Use the Tanning Shield Face Mask

Using the shield correctly is essential for achieving that seamless, contoured look. Follow these steps to ensure you are fully protected and perfectly tanned.

  1. Cleanse Your Skin: Before your session, ensure your face is free of heavy makeup, oils, or barriers that might cause the mask to slip. A fresh face ensures the best fit.
  2. Adjust for Comfort: Use the adjustable nose grips to ensure the mask sits comfortably on the bridge of your nose. It should feel snug enough to stay put but not tight enough to leave pressure marks.
  3. Position the Mask: Place the shield over your face. If you are in a lay-down bed, you can simply rest it on your face. If you are using a stand-up booth, secure it with the provided elastic string.
  4. Check the Edges: Ensure the edges of the mask are hovering correctly and not digging into your skin. This “float” is what prevents hard lines.
  5. Start Slow: If you are new to using the shield, start with shorter tanning intervals (8-12 minutes) to see how your exposed skin reacts to the new contrast.

Expert Tips for Achieving the Best Tan

To truly master the art of the contour tan, consider these tips from tanning professionals:

  • Hydrate the Exposed Areas: While the mask protects your T-zone, the rest of your face is still receiving UV exposure. Apply a high-quality facial tanning lotion to your jawline, neck, and ears to ensure these areas develop a rich, dark color that contrasts beautifully with your protected center face.
  • Rotate Your Head: To ensure the “blurring” effect works perfectly, slightly tilt your chin up or rotate your head occasionally during your session. This helps the light wrap around the shield’s edges for an even softer gradient.
  • Maintenance Matters: Your shield is a hygiene product. After every session, rinse it with warm water and mild soap to remove sweat and lotion residue. Weekly deep cleaning will keep the materials in top condition and prevent skin breakouts.

Comparing California Contour to Other Methods

Many tanners try DIY methods to protect their faces, but they often fall short compared to a dedicated tool.

  • Towels: Throwing a towel over your face blocks 100% of the UV rays, which protects you but leaves you with a completely pale face that doesn’t match your body. It also stifles your skin and can feel claustrophobic.
  • Traditional Goggles: Small goggles protect your eyes but leave your nose and delicate under-eye skin exposed to burning. They also frequently leave distinct white circles around the eyes.
  • Sunscreen Only: While SPF is crucial outdoors, using heavy sunblock in a tanning bed can block the tanning process unevenly and clog pores, leading to breakouts.

The California Contour offers a middle ground: it filters and contours rather than just blocking or exposing, providing a sophisticated result that DIY methods cannot match.

Addressing Concerns and Common Myths

Myth: “I won’t get any tan on my face at all.”
Reality: The mask creates a contour, not a total blackout. Your jawline, hairline, and outer cheeks will still tan beautifully. The protected area remains your natural skin tone (or a lighter tan), which creates a highlighting effect that many people pay makeup artists to replicate.

Concern: “It looks complicated to use.”
Reality: It is as simple as putting on a pair of sunglasses. Once you have adjusted the nose piece to your liking, it takes seconds to apply before your session.

Myth: “It will leave a line on my forehead.”
Reality: The “floating” design prevents this. As long as the mask is not pressed tightly against the skin with excessive pressure, the shadow cast by the UV light is soft and diffuse, leaving no hard lines.

Frequently Asked Questions

Does this mask fit all face shapes?

Yes, the California Contour is designed with a universal fit in mind. The adjustable nose grips and the open design allow it to accommodate various face shapes and sizes comfortably.

Can I use this for spray tanning?

Absolutely. The shield is excellent for spray tanning as it prevents the solution from settling into fine lines around the eyes and nose, and it keeps you from inhaling the mist.

How often do I need to replace it?

With proper care and regular cleaning, a California Contour shield is durable and can last for many years, making it a cost-effective investment compared to disposable stickers.

Is the California Contour Right for You?

If you value the longevity of your skin but love the confidence of a tan, the California Contour Tanning Shield is an essential addition to your beauty bag. It bridges the gap between safety and aesthetics, allowing you to enjoy the warmth of the bed without worrying about future wrinkles or sunspots on your most visible feature. By protecting the T-zone and sculpting the face with light, it offers a smarter, healthier way to glow.

For those in the Indianapolis area ready to upgrade their tanning experience, you don’t have to look far. You can purchase your own California Contour Tanning Shield directly at Broad Ripple Tans in Broad Ripple, Indianapolis, Indiana. Stop by today to protect your glow and your skin.

Call Now to Learn More

Related Post: Essential Tips for Using the California Contour Tanning Shield

Orange Spray Tan? How to Restore Your Natural Skin Tone

The goal of a spray tan is a sun-kissed, natural glow. Sometimes, however, the result is less bronze goddess and more…orange. This common tanning mishap can be frustrating, especially when you have an event on the horizon. An uneven application might leave streaks on your legs, or you might notice dark patches on your elbows and knees.

A bad spray tan can happen for many reasons, from improper skin prep to the formula itself. Understanding why your tan turned orange is the first step to fixing it and preventing it from happening again. This guide will walk you through immediate fixes, gentle exfoliation methods, and effective home remedies to correct an orange spray tan and restore your skin’s natural tone.

Call 317-257-8262 to Learn About Our Automated Spray Tan Beds in Broad Ripple Indiana

What to Do Right After Noticing the Mistake

Acting quickly is key to fixing a bad spray tan. The sooner you address the issue, the easier it will be to correct the color. Most self-tanning products contain dihydroxyacetone (DHA), an active ingredient that darkens the skin. This process takes several hours to fully develop. If you notice an uneven tone or an orange hue within the first few hours, you have a better chance of correcting it.

If you spot a problem right away, one of the first things you can do is take a warm shower. Use a gentle, oil-free soap and lightly wash the affected areas. Avoid harsh scrubbing, as this can make patchiness worse. The goal is to rinse off any excess product before it has a chance to fully set. A steam room or sauna can also be effective, as the heat and moisture open up your pores and help the tan fade more evenly.

Gentle Exfoliation Methods

Exfoliation is one of the most effective ways to fix an orange spray tan. By removing the top layer of dead skin cells, you can lighten the unwanted color and reduce streaks. However, it’s important to be gentle to avoid irritating your skin.

Exfoliating Mitts and Scrubs

Using an exfoliating mitt is a great way to gently buff away excess tan. Wet the mitt and use it in circular motions on the affected areas. This method gives you control over the pressure, so you can be more gentle on sensitive skin.

You can also make your own scrub at home. A simple mixture of sugar and olive oil works well. The sugar acts as a natural exfoliant, while the olive oil moisturizes your skin. Another popular option is a paste made from baking soda and a small amount of water. Apply the paste to dark or orange patches, let it sit for a few minutes, and then gently scrub it off in the shower.

Tan Removers and Erasers

For a more targeted approach, consider using a product specifically designed for tan removal. Self-tan erasers are formulated to break down the DHA on your skin, making it easy to wash away the unwanted color. These products are often gentler than physical scrubs and can remove an entire layer of tan in minutes. Apply the eraser as directed, let it sit for the recommended time, and then rinse it off.

Home Remedies to Lighten Dark Areas

If you’re dealing with stubborn dark spots on areas like your knees, elbows, and ankles, a few common household items can help.

Lemon Juice

The citric acid in lemon juice is a natural lightening agent. Mix equal parts lemon juice and water, and apply it to the dark patches with a cotton ball. Let it sit for a few minutes before rinsing it off. Be cautious when using lemon juice, as it can make your skin more sensitive to the sun. It’s also best to avoid using it on your face.

Baking Soda Paste

As mentioned earlier, a paste of baking soda and water is an effective remedy. Its mild abrasive nature aids in exfoliating dead skin cells, which often contribute to hyperpigmentation. Apply it to the darkest areas, let it dry for about 10-15 minutes, and then gently rinse it off.

Whitening Toothpaste

This may sound unusual, but the whitening agents in some toothpastes can help lighten small, stubborn spots. Apply a small amount to the dark area, let it sit for a few minutes, and rinse thoroughly.

Learn About Our Automated Spray Tanning Beds!

Tips for Your Next Spray Tan

Prevention is always the best strategy. To avoid another orange spray tan in the future, follow these tips for a flawless application:

  • Exfoliate First: Exfoliate your entire body 24 hours before your spray tan. This creates a smooth canvas for an even application.
  • Moisturize Dry Areas: Before tanning, apply a light layer of moisturizer to dry areas like your elbows, knees, ankles, and hands. This prevents these spots from absorbing too much product.
  • Use a Barrier Cream: For extra protection on your hands and feet, use a barrier cream. This will stop them from turning orange.
  • Opt for Gradual Tan: If you’re new to self-tanning, consider using a gradual tanning lotion. It allows you to build color slowly, giving you more control over the final result.
  • Choose a Professional: When in doubt, go to a reputable tanning salon. A professional technician can help you choose the right shade for your skin tone and ensure an even application.

Frequently Asked Questions

How can I prevent dark spots on my knees and elbows?

Moisturizing is key. Before applying a spray tan, apply a light, oil-free lotion to your knees, elbows, ankles, and any other dry areas. This creates a barrier that prevents these spots from absorbing too much tanning solution.

Will exfoliating remove my entire spray tan?

Gentle exfoliation will lighten your tan and help remove streaks, but it’s unlikely to remove it completely in one go. If you want to remove the tan entirely, you may need to exfoliate several times over a few days or use a dedicated tan removal product.

Can I use lemon juice on my face to lighten the tan?

It is not recommended to use lemon juice on your face. The skin on your face is more sensitive, and the high acidity of lemon juice can cause irritation and increase sun sensitivity. Stick to gentle facial exfoliants or a vitamin C serum instead.

How long does it take for a bad spray tan to fade?

A spray tan typically fades over 5-7 days as your skin naturally exfoliates. If you’re actively trying to remove it, you can speed up this process significantly. With exfoliation and other removal methods, you can often correct or remove a bad tan within 1-3 days.

What are the best exfoliating products for sensitive skin?

For sensitive skin, choose a gentle physical exfoliant like a soft exfoliating mitt or a fine-grain scrub. A chemical exfoliant containing lactic acid can also be a good option, as it is one of the milder alpha-hydroxy acids (AHAs). Always do a patch test before trying a new product.

In Summary

A bad spray tan can feel like a disaster, but it’s almost always fixable. With quick action, gentle exfoliation, and a few simple home remedies, you can correct an orange hue and even out streaks. And by properly preparing your skin for your next session, you can ensure a beautiful, natural-looking glow every time.

For more advice on achieving the perfect sunless tan, check out our other blog posts on tanning and skincare.

View Our Spray Tan Blogs

Related Post: 9 Things That Can Fix an Orange Tan
Calm Post-Tanning Redness: DIY Face Masks You Can Make at Home

Sunshine on your skin feels incredible, but too much exposure can leave you with a painful reminder of your time outdoors or in the tanning bed. Post-tanning irritation isn’t just unsightly redness—it’s your skin’s way of signaling that it needs immediate care and attention.

Whether you’re dealing with mild tanning bed rash or more noticeable sunburn, the discomfort can affect your daily routine and confidence. Many people experience redness, inflammation, and sensitivity after tanning, leaving them searching for quick relief that won’t further irritate their already compromised skin.

The good news is that effective post-tan skin care doesn’t require expensive treatments or harsh chemicals. Natural homemade face masks offer gentle, soothing relief using ingredients you likely already have in your kitchen. These DIY face mask solutions can help calm inflammation, reduce redness, and restore your skin’s natural balance—all while being kind to sensitive skin.

Understanding how tanning affects your body is crucial for maintaining healthy skin long-term. When you create targeted masks using ingredients like aloe vera, honey, and cucumber, you’re providing your skin with the specific nutrients it needs to heal and recover from sun exposure.

Call 317-257-8262 to Learn All About Our Skin Care Products for Tanning!

Why Choose Homemade Masks for Post-Tanning Care?

Transparent Ingredients

Natural ingredients offer several advantages over commercial products when treating tanning sunburn and irritation. Store-bought masks often contain preservatives, fragrances, and chemicals that can further aggravate already sensitive skin. Homemade soothing masks, on the other hand, allow you complete control over what touches your face.

Customize According to Skin Type

Creating your own skin irritation mask means you can customize ingredients based on your specific needs and skin type. You’ll know exactly what’s going into your treatment, eliminating concerns about hidden irritants or allergens that might worsen your condition.

Cost Savings

Cost-effectiveness is another significant benefit. The ingredients for these after tanning care masks are typically affordable and multi-functional, meaning you can use them for other skincare needs as well. Fresh ingredients also tend to be more potent than their processed counterparts, delivering maximum healing benefits to your irritated skin.

Key Ingredients for Soothing Post-Tan Masks

Aloe Vera

Known for its exceptional cooling and anti-inflammatory effects, aloe vera stands as the gold standard for calming sunburned skin. This succulent plant contains compounds that actively reduce redness and provide immediate relief from burning sensations. Its gel-like consistency also helps lock in moisture, preventing the peeling that often follows sun exposure.

Honey

Raw honey offers powerful antibacterial properties that help prevent infection in compromised skin while providing deep moisture. Its natural humectant qualities draw moisture from the environment into your skin, promoting faster healing. Honey also contains antioxidants that support skin repair at the cellular level.

Cucumber

With its high water content and naturally cooling temperature, cucumber provides instant hydration and relief from swelling. The silica in cucumbers helps strengthen skin tissue, while vitamin C supports collagen production for faster recovery.

Oatmeal

This kitchen staple acts as a gentle exfoliant while simultaneously soothing irritated skin. Oatmeal contains beta-glucans that form a protective film on the skin’s surface, reducing water loss and inflammation. Its anti-inflammatory compounds help calm itching and reduce the urge to scratch damaged areas.

Yogurt

Rich in probiotics and lactic acid, yogurt helps balance your skin’s natural flora while providing gentle exfoliation. The cool temperature and creamy texture offer immediate comfort, while the proteins and fats nourish healing skin cells.

Learn About Our Automated Spray Tanning Booths!

Effective Mask Recipes for Post-Tanning Relief

Aloe Vera and Cucumber Mask

Combine 2 tablespoons of fresh aloe vera gel with 1/4 cup of finely grated cucumber. This powerhouse combination delivers intense cooling relief while providing deep hydration to sun-damaged skin.

Mix the ingredients until you achieve a smooth, spreadable consistency. The high water content from both ingredients will create a naturally cooling mask that provides immediate comfort upon application.

Honey and Oatmeal Mask

Blend 2 tablespoons of raw honey with 1/4 cup of finely ground oatmeal. Add a small amount of warm water if needed to create a paste-like texture. This mask combines honey’s healing properties with oatmeal’s gentle exfoliating action to remove dead skin cells while promoting regeneration.

The antibacterial properties of honey help prevent secondary infections that can occur when skin barriers are compromised by sun damage.

Yogurt and Turmeric Mask

Mix 3 tablespoons of plain Greek yogurt with 1/4 teaspoon of turmeric powder. Turmeric offers remarkable anti-inflammatory and antioxidant benefits, helping reduce redness and promote even skin tone. The probiotics in yogurt support skin health by maintaining beneficial bacteria populations.

Use turmeric sparingly to avoid temporary staining, and ensure thorough removal after treatment.

Green Tea and Honey Mask

Brew strong green tea and allow it to cool completely. Mix 2 tablespoons of the cooled tea with 1 tablespoon of honey. Green tea’s antioxidants help combat free radical damage from UV exposure, while honey provides moisture and healing support.

Avocado and Aloe Vera Mask

Mash 1/2 ripe avocado with 2 tablespoons of aloe vera gel. This rich combination provides deep moisturization for extremely dry, sun-damaged skin. Avocado’s healthy fats help restore the skin’s protective barrier.

Proper Mask Application Techniques

  1. Start with thoroughly cleansed skin to ensure optimal ingredient absorption.
  2. Using clean fingertips or a soft brush, apply your chosen mask evenly across your face, carefully avoiding the delicate eye area where skin is thinnest and most sensitive.
  3. Leave the mask on for 15-20 minutes to allow the active ingredients sufficient time to penetrate and work their healing magic. During this time, lie back and relax—stress can actually slow the healing process.
  4. Rinse the mask thoroughly with cool water, which helps close pores and provides additional soothing relief.
  5. Pat your skin dry gently with a soft, clean towel rather than rubbing, which could cause further irritation.
  6. Apply these masks once after tanning for optimal results. While the temptation might be strong to reapply frequently, over-treatment can sometimes cause additional sensitivity.
  7. For enhanced cooling effects, chill your mask ingredients in the refrigerator for 15-20 minutes before mixing. The cold temperature provides extra relief for inflamed skin.

Looking for Quality Tanning Products? Check These Out!

Important Safety Precautions

Always perform a patch test 24 hours before applying any new mask to your face. Apply a small amount of the mixture to your inner wrist or behind your ear and wait for any signs of reaction.

Avoid using these masks on open wounds or severely blistered skin, as natural ingredients can sometimes cause stinging in compromised areas. If you have sensitive skin, start with shorter application times of 5-10 minutes to gauge your skin’s response.

Exercise particular caution with turmeric, as it can temporarily stain both skin and clothing. Use minimal amounts and rinse thoroughly to prevent discoloration.

Keep all mask ingredients away from your eyes to prevent irritation. If accidental contact occurs, rinse immediately with cool water.

If redness, irritation, or discomfort worsens after using any mask, discontinue use immediately and consult a dermatologist for professional guidance.

Additional Care Tips for Optimal Results

Follow up with a gentle, fragrance-free moisturizer after removing your mask to seal in hydration and maintain your skin’s protective barrier. Look for products containing ceramides or hyaluronic acid for enhanced moisture retention.

Avoid direct sun exposure immediately after treatment, as your newly treated skin may be more photosensitive than usual. If you must go outside, apply broad-spectrum sunscreen with at least SPF 30.

Stay well-hydrated by drinking plenty of water to support your skin’s healing process from within. Proper hydration helps your body repair damaged cells more efficiently.

Store any leftover mask ingredients in airtight containers in the refrigerator, but use them within 24 hours for safety and maximum potency. Discard any mixture that shows signs of spoilage, such as changes in color, odor, or texture.

Conclusion

Natural homemade masks offer a gentle, effective approach to treating post-tanning irritation without harsh chemicals or expensive treatments. By harnessing the healing power of simple kitchen ingredients, you can provide your skin with the care it needs to recover and thrive.

Remember that prevention remains the best strategy for healthy skin. While these masks provide excellent treatment for existing irritation, protecting your skin from excessive UV exposure will prevent future damage and maintain your skin’s long-term health.

Try these masks today! Your skin will thank you for the natural, nurturing care that helps restore comfort and confidence after sun exposure.

If you are ready to hit the tanning beds once again, give our Indianapolis tanning salon a try! We offer great deals on a wide variety of beds and spray tanning options, including our automated spray tanning booth. Enjoy a vast inventory of tanning products like the California contour face mask and our luxury infrared beds!

View Our Tanning Packages and Deals

Related Post: How to Treat Tanning Bed Burns at Home